
A connection pattern-based approach to detect network traffic anomalies.
The approach provides a methodology for automatically configuring Snort-based Anomaly Detection Systems (ADSs) for industrial settings. The methodology includes a graphical interface, a formal language, and shell scripts, used to model the network topology and to automatically generate ADS rules.
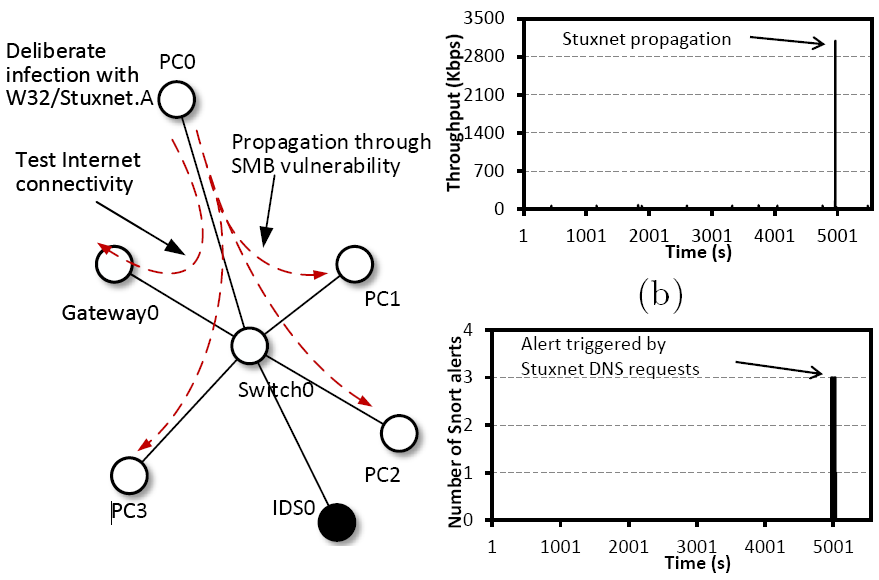
The approach has been fully documented in the paper A Connection Pattern-based Approach to Detect Network Traffic Anomalies in Critical Infrastructures, published in the Proc. of the 7th European Workshop on Systems Security, Amsterdam, The Netherlands.
This page provides the source code of applications and scripts used in the validation of the developed tool. The code found on this page is provided under the GNU Public License.
Requirements
- Modified Netlab Client: The modified client sources can be downloaded from here while the .jar file can be downloaded from here. The original unmodified version can be found on the Emulab web page. The .ns files we built are based on three ICS topologies, as described in "Guide to Industrial Control (ICS) Security" (NIST 2011), and can be downloaded from here.
- Python scripts: The first and second script were developed in Python 2.7.
- NS-3 scripts: The scripts can be downloaded from here. For details on how to install NS-3 on your computer, please follow the instructions from the official website.
How to use
- Create a network topology: Using the modified Netlab Client, reproduce the desired topology making sure to add Traffic Generators. To do this select two components (using the mouse and the SHIFT key) and in the Traffic Generator list on the Properties menu, click the +/- button. Once the topology is completly reproduced, click on Windows-> NS File and save the file on your computer. This step is not mandatory, but it is recomended to users who are not familliar with NS-2 scripting language. Advanced users might choose to write the .ns file manually, while remembering to add Traffic Generators.
- Executing the Python scripts: The execution of the first script is optional, but it is recomended as it generates a file containing all the components in the .ns file in which the user can attach IP addresses. Whatever the users choice may be, the existance of the nodes.txt file is required for the next script. Executing the second script will generate a file containing the monitoring nodes on the traffic paths, and several .rules files one for each IDS and one based on the topology described in the .ns file. Also to be noted is that if you chose to add the snort.conf file in the same folder as the scripts, the refferences to the new .rules file will be added automatically.
- Generating traffic: Traffic is generated with NS-3. To execute the NS-3 scripts mentioned above use ./waf --run (path to script). The process will take a while to finish, but in the end it will generate a large number of .pcap files. To merge these files we used Wireshark with the mergecap command.
- Testing the detection of attacks on the generated traffic with SNORT: First ensure that the new files are added to snort.conf as a refferance. Then, to test the detection of attacks with SNORT IDS, run the folowing command: sudo snort -vd -c snort.conf -r file.pcap -l logs.